In this article I'm trying to address some of the container image security concerns that might come up when writing your own dockerfiles. How container image will be used might not be your worry, but it doesn't mean that security cannot be enhanced at build/publish time.
Container security is pretty wide topic which can be divided into two parts: image and runtime security. The former refers to process of building container image that is packaging target application. The latter is all about the environment where the containers is actually deployed. The difference is also where the security awareness needs to happen, which is development and operations respectively. In this article I will try to address some of the concerns that you might come up with when creating container images.
How do I know the image I’m trying to run is the one I’ve tested?
Container image versioning with tag is mostly used for differentiation between increments of container content. The problem with tagging is that those can be easily overwritten. If for some reason container registry is compromised, pulling container images only based on tags can end up with introducing malicious software into your deployment. It can get more scary knowing that container image swap can happen only at build or deployment time, because this is the only moment where images are actually pulled. Changes could be reverted afterwards to cover tracks.
More likely, this can happen by accident. I can imagine many scenarios where image tag could be simply overwritten. Often image immutability can be configured on container registry side to lock changes on pushed images, but it is not always there and it doesn’t need to fit your CI or release setup. To be on the safe side you can always use digest by adding @sha256:<image checksum>. When starting container, digest will be used similar to tag to determine which exact image is supposed to be used. Big advantage of this approach is that any tiny change in image will result in big change in hash, so you are sure that what you use is exactly the same no matter when and where it is used.
This can be used in docker client and kubernetes similarly, just be aware that when using digest on kubernetes, whenever checksum doesn’t match pod will be created but it will fail on image pull.
$ docker pull nginx@sha256:922c815aa4df050d4df476e92daed4231f466acc8ee90e0e774951b0fd7195a4
sha256:922c815aa4df050d4df476e92daed4231f466acc8ee90e0e774951b0fd7195a4: Pulling from library/nginx
Digest: sha256:922c815aa4df050d4df476e92daed4231f466acc8ee90e0e774951b0fd7195a4
Status: Image is up to date for nginx@sha256:922c815aa4df050d4df476e92daed4231f466acc8ee90e0e774951b0fd7195a4
docker.io/library/nginx@sha256:922c815aa4df050d4df476e92daed4231f466acc8ee90e0e774951b0fd7195a4
# breaking digest on purpose$ docker pull nginx@sha256:922c815aa4df050d4df476e92daed4231f466acc8ee90e0e774951b0fd7195a5
Error response from daemon: manifest for nginx@sha256:922c815aa4df050d4df476e92daed4231f466acc8ee90e0e774951b0fd7195a5 not found: manifest unknown: manifest unknown
# digest can also be used with kubectl$ kubectl run --generator=run-pod/v1 busybox --rm-ti--image=busybox@sha256:1303dbf110c57f3edf68d9f5a16c082ec06c4cf7604831669faf2c712260b5a0 /bin/sh
If you don't see a command prompt, try pressing enter.
/ #
How do I know the content of my image is the expected one?
This is particularly connected with what is placed in the container image and those should be also verified against checksum. Most packaging tools will validate the checksum, but often different sort of binaries are downloaded directly which might be not fully secure. Example function for download verification of kubectl can be found below. This can become part of dependency download script or used directly in Dockerfile.
check_sum(){echo"$1$2" | sha256sum-cs -
if[$?];then
echo"$2 OK"else
echo"[ERROR] $2 failed check"exit 1
fi}# You might want to keep versions and checksums in separate fileKUBECTL_VERSION=v1.16.0
KUBECTL_CHECKSUM=4fc8a7024ef17b907820890f11ba7e59a6a578fa91ea593ce8e58b3260f7fb88
curl -s-L https://storage.googleapis.com/kubernetes-release/release/${KUBECTL_VERSION}/bin/linux/amd64/kubectl -o /usr/local/bin/kubectl
check_sum "${KUBECTL_CHECKSUM}" /usr/local/bin/kubectl
How do I know the container image will not compromise system security?
Since containers are executed on the same machine and share kernel, each container process becomes potential gate to the system. Below you can find some of the practices that help mitigating potential threat of compromising host system.
Use base images
It is better to maintain common base for your images that particular application container can extend. This allows to focus on security of limited number of images instead of maintaining it across all teams that creates their own containers. You can then perform vulnerability scans, tests and others to publish “gold” image that then will be distributed to all applications using it as a starting point.
Harden images
Images that becomes base for your containers usually provides wider set of tools, so that they can be used in many scenarios. After adding your own application on top of it, the use case becomes fixed and you can get rid of many parts of it. There are quite many steps that can be taken from within the container like disabling shell, removing sbin binaries or package managers. Hardening is done as a last step to tightly limit the attack surface. Some examples of hardening can be found in below links.
Use multistage builds, limit the binaries, limit the size
Limiting the size of image is a good practice because it forces to get rid of unnecessary binaries and dependencies from the image. The more of it is left the more potentially open doors you leave. Try to use multistage builds (introduced from docker version >17.05) that allows to create preliminary images for some specific tasks like building, downloads, etc. Afterwards you can just copy outcomes of those activities and place it in final image, everything else will be left behind.
Example of dockerfile using multistage build to copy outcome of golang build to final image (IBM portieris)
FROM golang:1.10 as golang
WORKDIR /go/src/github.com/IBM/portieris
RUN mkdir-p /go/src/github.com/IBM/portieris
COPY . ./
RUN make build-deps
RUN CGO_ENABLED=0 GOOS=linux go build -a-o ./bin/trust ./cmd/trust
FROM scratch
COPY --from=golang /etc/ssl/certs/ca-certificates.crt /etc/ssl/certs/
# Create /tmp for log files
WORKDIR /tmp
WORKDIR /
COPY --from=golang /go/src/github.com/IBM/portieris/bin/trust .
CMD ["./trust","--alsologtostderr","-v=4","2>&1"]
Use non-root user
Containers should be blocked from operating as root user, for same reason you should avoid using root on regular basis on your machine. It can be also mitigated in container runtime, but as most services can run as non-root user there is no reason not to use it. You can just create user in dockerfile using below commands. It will create nonprivileged user in nonprivileged group without home directory and with disabled shell.
RUN groupadd -g 60001 nonprivileged && useradd -g 60001 -l-M-s /bin/false -u 60001 nonprivileged
(...)
USER 60001:60001
It is good to use explicit uid/gid to unify user coordinates across the system, it can also be referenced in container runtime afterwards. UID <=60000 are usually reserved for system, application and user accounts so use uid >60000. Also perform all root access operations before switching to created user, avoid using sudo.
Vulnerability checks
Security is a process not feature and it is dynamic, with all good will to provide best protection, you can never be sure that tomorrow will not reveal vulnerability in your container images. Fortunately there are tools to perform periodic checks on your docker images and one of it is CNCF incubating project called harbor, which is docker and helm registry with build-in vulnerability checks and docker content trust. Harbor is using clair for static vulnerability analysis and notary to provide image signing - more details about it can be found in next section. You can easily deploy harbor on kubernetes cluster using its helm chart.
In my case I used following values.yaml parameters:
# values.yaml# optional proxy configuration, needed for vurnelability updates#proxy:# httpProxy: http://<proxy_ip>:<proxy_port>/# httpsProxy: http://<proxy_ip>:<proxy_port>/# for simplicity I disabled volume creation
persistence:
enabled: false
externalURL: https://harbor.your.cluster.domain
expose:
# if you want use own certificates# tls:# secretName: harbor# notarySecretName: notary
ingress:
hosts:
core: harbor.your.cluster.domain
notary: notary.your.cluster.domain
I was using generated self-signed certs which needs adding harbor CA cert to my local docker engine to communicate over https. If you want to play with it on kubernetes you need to do the same on all the nodes that will run containers from harbor’s images.
$ kubectl get secret harbor-harbor-ingress -ojsonpath="{.data['ca\.crt']}" | base64-d> harbor
$ sudo cp harbor /etc/docker/certs.d/harbor.your.cluster.domain/ca.crt
# for docker content trust CA cert needs to be added also for notary$ sudo cp harbor /etc/docker/certs.d/notary.your.cluster.domain/ca.crt
$ cp harbor ~/.docker/tls/notary.your.cluster.domain/ca.crt
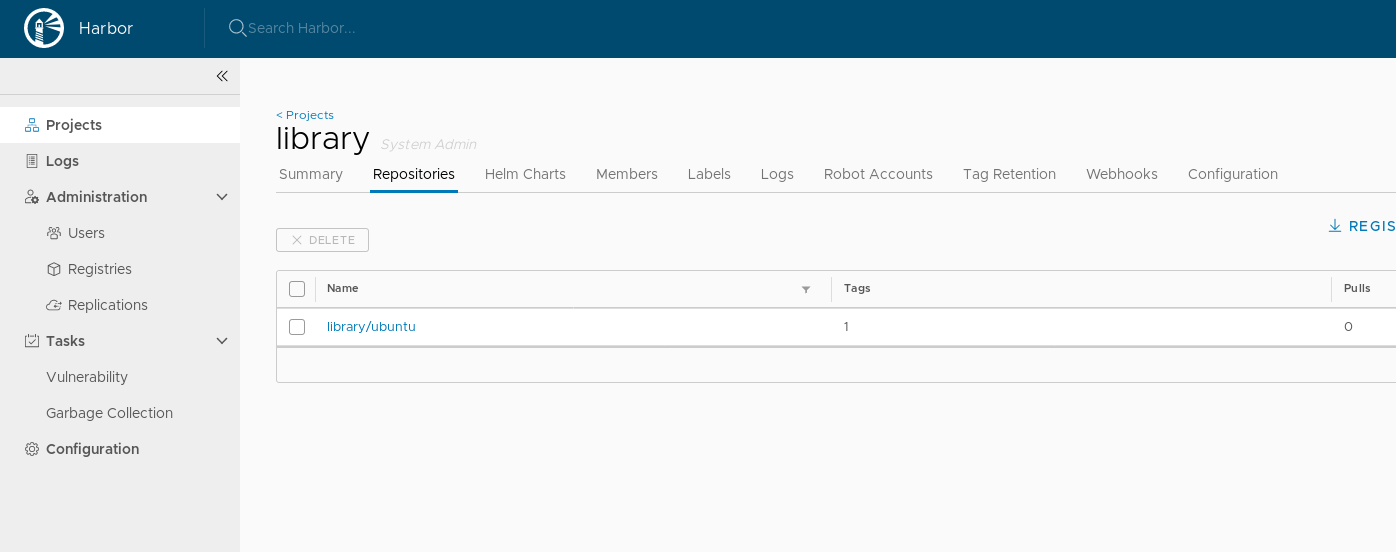
We should now be ready to push some images to harbor. I will use ubuntu image and retag it so that it uses my newly created registry.
After login to https://harbor.your.cluster.domain with admin/Harhor12345 credentials in Projects>library you should see your newly created repository.
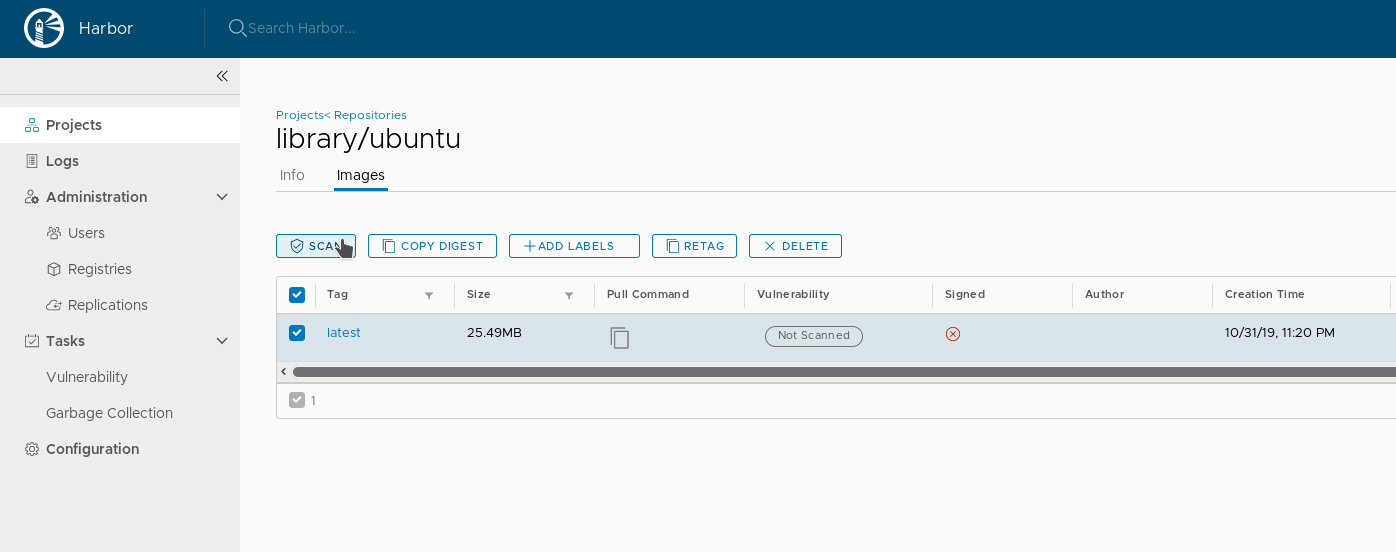
With the image in the registry you can perform vulnerability scans on it to verify if there is anything to worry about. It can be triggered manually like showed below, but also repository can be configured to perform it on every push.
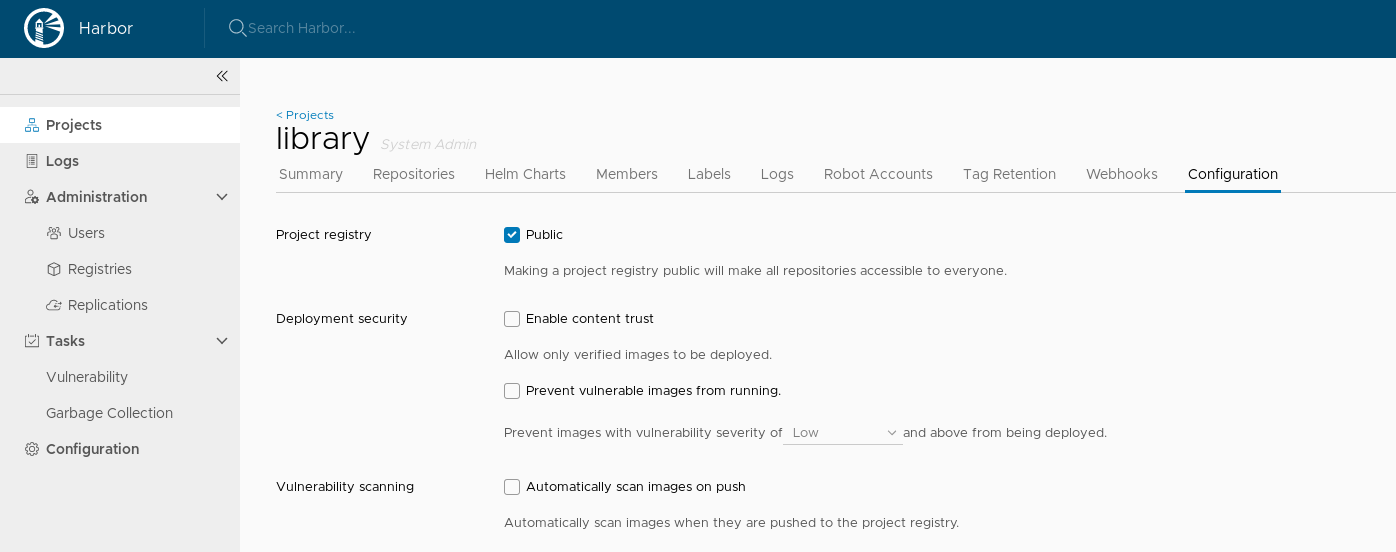
Apart from mentioned automatic scan functionality, you can also prevent users from using vulnerable images. There is also option to enable using only signed images which is what we will explore in last section of this article.
The answer to this question is the docker content trust, this is container engine functionality forcing to use image signatures. As any signature in IT world is supposed to provide integrity and author of the content. During push, metadata describing particular container image are signed by author private key and stored in Notary db. When pulling image, docker client can verify with public key if all the information matches downloaded content. This might be a little oversimplified, but enough to understand why you need content trust. Checkout References for articles with more details on this topic.
If you prevent unsigned content from being downloaded from Harbor (Enable content trust), you will not be able to pull ubuntu image that was uploaded in previous section.
$ docker pull harbor.your.cluster.domain/library/ubuntu:latest
Error response from daemon: unknown: The image is not signed in Notary.
Let’s sign the image now so that it can be downloaded securely, but before that we need to configure content trust in container engine. First two lines enable content trust and define Notary endpoint, other two are setting passphrases to avoid being prompted when pushing images.
$ export DOCKER_CONTENT_TRUST=1
$ export DOCKER_CONTENT_TRUST_SERVER=https://notary.your.cluster.domain
# below are example secrets used to generate private keys$ export DOCKER_CONTENT_TRUST_REPOSITORY_PASSPHRASE="doubled deutsche deserve paris"$ export DOCKER_CONTENT_TRUST_ROOT_PASSPHRASE="doubled deutsche deserve paris"
If you refresh repository in Harbor you will notice that image is now signed. There were also two keys generated under the hood, one root key which is used for generating repository keys and actual key for library/ubuntu. Root key should be kept in secure place and used only when generating new repository keys. Repository key is also important but it needs to be there to sign new image tags every time. Keys are stored in ~/.docker/trust/private/.
Content trust in Kubernetes
Enforcing docker content trust on your local machine is pretty simple - you just need to set DOCKER_CONTENT_TRUST=1. On kubernetes you don’t have direct access to docker engine because it is kubelet that talks to it. Fortunately admission controllers can be used here, they are plugins designed to enforce certain behaviors on your cluster. Example of such plugin is IBM portieris, the problem is that currently it doesn’t support Harbor’s authentication methods. At the time of writing this article there is PR ongoing that will possibly fix this issue.
Summary
In this article I went through some hints on improving container image security, most of them can be applied right away. I also showed how to setup Harbor registry and use it to enhance security of your images. The only missing part in my setup is enforcing signed content on kubernetes which hopefully will be available in near future. Having Portieris in place allows defining policies forcing usage of signed images from particular registry.